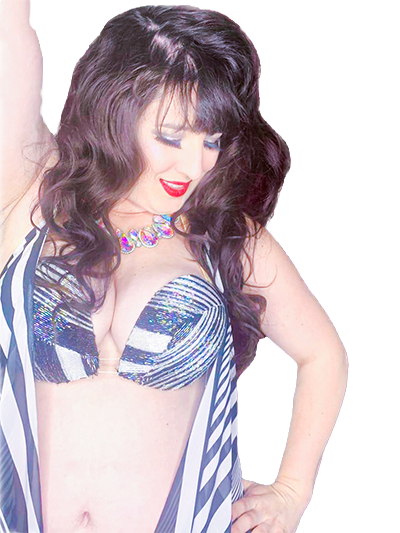
✨✨Making it✨✨
- Athena Howe

- May 6, 2021
- 3 min read
Hey dancers!
Thanks so much for joining me in making it. In this blog we are going to be covering how I create a costume, step by step. We are going to go from starting the costume to decorating it. One day I’ll do a blog on fitting, but I’m hoping it will be safe enough soon to get pictures with a model. Let me know what you think!
Making your own bra base
There are some great options coming out of Cairo but for this project I’m going to make my own bra base. This is to allow people with different bodies who maybe those dina cups don't fit correctly.
I started with two cups cut out of a strapless bra. On the inside i used some soldering iron (because that's the extra metal i had
around) to reinforce the inside of the cup. I plasticized the cups to reinforce them. I used a bowl I covered in plastic wrap stuck underneath the bra to give it stability. I used modge podge and made a couple of layers letting it dry for a few hours in between.
Belt patterns
In my costuming, I use about two patterns:
-One i've shamelessly lifted from a 1970s belly dance pattern. This includes a small medallion in the front and l longer curved panel in the back.
- One I call the superhero cut. On this front of the pattern I have a dip. This is really nice for anyone with any sort of stomach that protrudes
because it gives you extra room, and then the belt won’t overlap your stomach. It also gives you access to show off lower body undulations/
For my body I only need a slight curve to make it fit my body currently. A completely straight belt will gapon most humans with different sized butts. You can always add some darts though that can be hard and that can be hard to manage with beading. You can also adjust the size of a ready-made costume by using elastic and building your own casing around it.
Covering the bra and belt with fabric
I use a fusible felt interfacing for my inner belt. I iron the fabric to the base, then sew the fabric to the belt base. Some of these fabrics are so delicate that any extra pin pricks would stay in the costume forever.
I use quilting clips to tack the fabric to the front of the bra. I don't need it to be perfect if it's going to be covered in appliques.I personally don't like the look of a dart on a cup. I set the fabric down and I pull and I pull and I pull until it ends up with a smooth surface. This takes me about 30 minutes per cup, as opposed to about the 15 the dart method would use.
How to apply your straps to your bra
To have the same angle on either side I use a book to make sure that a straight edge for the rib cage strap and the little one in the middle
are the same. These angles are really important because it's going to impact how your bra actually fits. I do some pretty serious hand stitching to keep it together. From there, I check the shoulder straps to make sure all the angles work.
First fitting
Before lining and before any sort of decoration I want to make sure I’m pretty satisfied by where we are.
Belt- I like to make sure there's enough room to account for any body changes that are normal for your body. I also want to make sure that the top of my belt as we go around my body visually looks straight. (We know it's really curved)
Bra- I want to make sure that my flesh is generally covered. I want to make sure the connections look good and that the angles of the straps support and flatter my body.
Design Concepts- layering, texture, rhinestone ratios
Layering- adding layers of different elements to add visual interest. For example, the decorate fabric layer, sequins, then rhinestones and fringe. Make sure to use different colors and tones.
Texture- Using elements that have different looks; ie using smooth, velvety, and rough textures. They will all look different and catch differently on stage.
Rhinestone ratio-
Two to one for decoration so if I have two things on the bottom I have one thing on the top. This will only cover the top edge of the bra. If you want both covered it’s one to one for me (I am a G cup). I do believe more is more.
Extra tip:
When checking placement, I let my eyes go unfocused and I see where some part needs more or less. Then I let it sit for a day or two before I sew it all together.


Comments